Latest News
Loading...
Showing posts with label kali linux. Show all posts

Monday, 13 June 2016

How To Use Skype.sh In Kali Linux


Today i will tell you how to use my script skype.sh script to install skype in kali linux

  1. Get my script from here     Skype.sh
  2. Save to desktop
  3. Open Terminal
  4. cd Desktop
  5. chmod +x skype.sh
  6. ./skype.sh
  7. Enjoy :)


Monday, 23 May 2016

Nikto Web Vulnerability Scanner (Linux)


Nikto is an Open Source (GPL) web server scanner which performs comprehensive tests against web servers for multiple items, including over 6400 potentially dangerous files/CGIs, checks for outdated versions of over 1200 servers, and version specific problems on over 270 servers. It also checks for server configuration items such as the presence of multiple index files, HTTP server options, and will attempt to identify installed web servers and software. Scan items and plugins are frequently updated and can be automatically updated.

Steps to use Nikto in linux :
  1. Open Terminal.
  2. Write nikto -h www.site.com.
  3. -h means host.
  4. This will start scan full website for vulnerability.
  5. Enjoy.


Note: Use your knowledge for good purposes only.

Saturday, 30 January 2016

Mastering Kali Linux for Advanced Penetration Testing Ebook


A practical guide to test your network's security with Kali Linux, the preferred choice of penetration testers and hackers.


Friday, 29 January 2016

Linux Basics for the Aspiring Hacker, Part 1 (Getting Started)


There are some exceptions, though, including software like Cain and Abel, Havij, Zenmap, and Metasploit that are developed or ported for Windows.
When these Linux apps are developed in Linux and then ported over to Windows, they often lose some of their capabilities. In addition, there are capabilities built into Linux that simply are not available in Windows. That is why hacker tools are in most cases ONLY developed for Linux.
To summarize, to be a real expert hacker, you should master a few Linux skills and work from a Linux distribution like BackTrack or Kali.
Image via wonderhowto.com
For those of you who've never used Linux, I dedicate the next few tutorials on the basics of Linux with an emphasis on the skills you need for hacking. So, let's open up BackTrack or your other Linux distribution and let me show you a few things.

Step 1: Boot Up Linux

Once you've booted up BackTrack, logged in as "root" and then type:
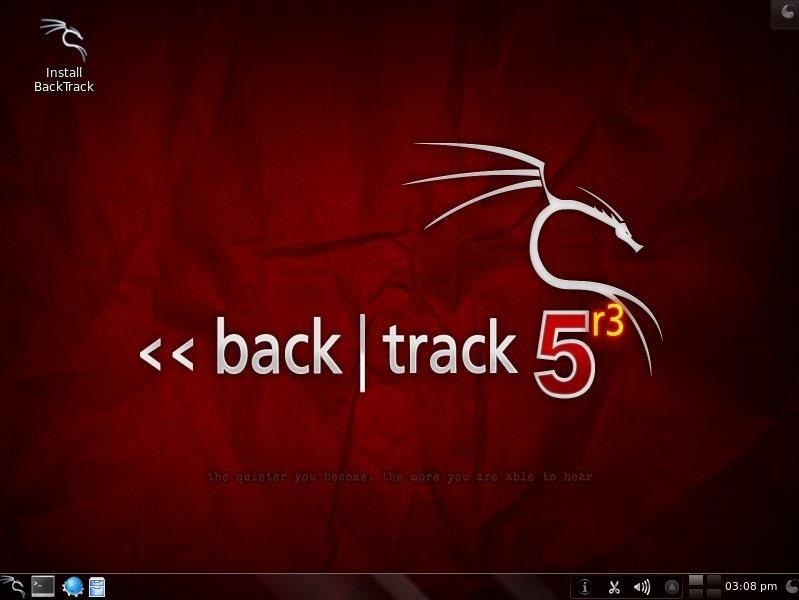
  • bt > startx
You should have a screen that looks similar to this.

Step 2: Open a Terminal

To become proficient in Linux, you MUST master the terminal. Many things can be done now in the various Linux distributions by simply pointing and clicking, similar to Windows or Mac OS, but the expert hacker must know how to use the terminal to run most of the hacking tools.
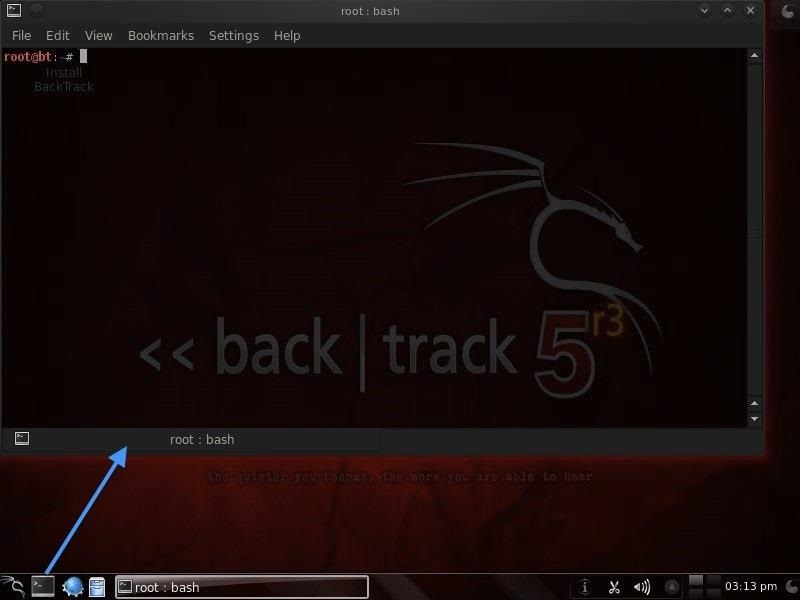
So, let's open a terminal by clicking on the terminal icon on the bottom bar. That should give us a screen that looks similar to this.
If you've ever used the command prompt in Windows, the Linux terminal is similar, but far more powerful. Unlike the Windows command prompt, you can do EVERYTHING in Linux from the terminal and control it more precisely than in Windows.
It's important to keep in mind that unlike Windows, Linux is case-sensitive. This means that "Desktop" is different from "desktop" which is different from "DeskTop". Those who are new to Linux often find this challenging, so try to keep this in mind.

Step 3: Examine the Directory Structure

Let's start with some basic Linux. Many beginners get tripped up by the structure of the file system in Linux. Unlike Windows, Linux's file system is not linked to a physical drive like in Windows, so we don't have a c:\ at the beginning of our Linux file system, but rather a /.
The forward slash (/) represents the "root" of the file system or the very top of the file system. All other directories (folders) are beneath this directory just like folders and sub-folders are beneath the c:\ drive.
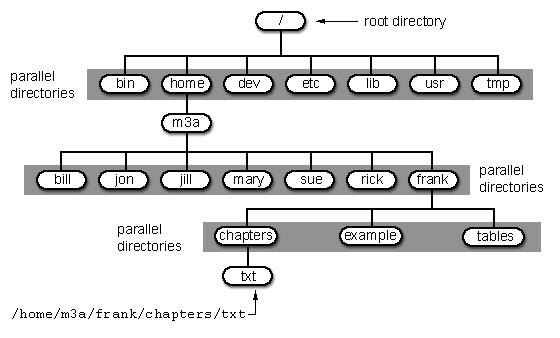
To visualize the file system, let's take a look at this diagram below.
It's important to have a basic understanding of this file structure because often we need to navigate through it from the terminal without the use of a graphical tool like Windows Explorer.
A couple key things to note in this graphical representation:
  • The /bin directory is where binaries are stored. These are the programs that make Linux run.
  • /etc is generally where the configuration files are stored. In Linux, nearly everything is configured with a text file that is stored under /etc.
  • /dev directory holds device files, similar to Windows device drivers.
  • /var is generally where log files, among other files, are stored.

Step 4: Using Pwd

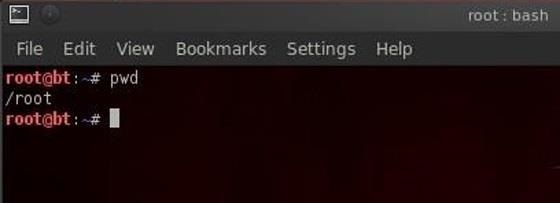
When we open a terminal in BackTrack, the default directory we're in is our "home" directory. As you can see from the graphic above, it's to the right of the "root" directory or one level "below" root. We can confirm what directory we are in by typing:
  • bt > pwd
pwd stands for "present working directory" and as you can see, it returns "/root" meaning we're in the root users directory (don't confuse this with the top of the directory tree "root." This is the root users directory).
pwd is a handy command to remember as we can use it any time to tell us where we are in the directory tree.

Step 5: Using Cd Command

We can change the directory we're working in by using the cd (change directory) command. In this case, let's navigate "up" to the top of the directory structure by typing:
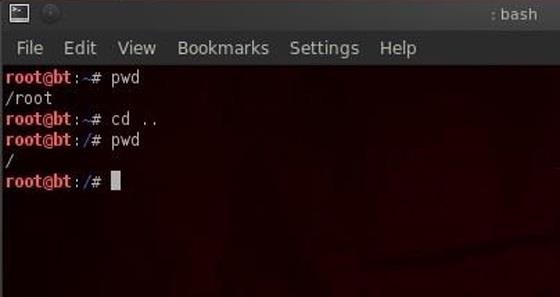
  • bt > cd ..
The cd command followed by the double dots (..) says, "move me up one level in the directory tree." Notice that our command prompt has changed and when we type pwd we see that Linux responds by telling us we are in the "/" or the top of the directory tree (or the root directory).
  • bt > pwd

Step 6: Using the Whoami Command

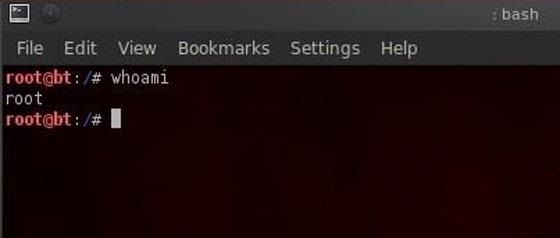
In our last lesson of this tutorial, we'll use the whoami command. This command will return the name of the user we're logged in as. Since we're the root user, we can log in to any user account and that user's name would be displayed here.
  • bt > whoami
Source : null-byte

Making a Kali Bootable USB Drive

Our favorite way, and the fastest method, for getting up and running with Kali Linux is to run it “live” from a USB drive. This method has several advantages:
  • It’s non-destructive — it makes no changes to the host system’s hard drive or installed OS, and to go back to normal operations, you simply remove the “Kali Live” USB drive and restart the system.
  • It’s portable — you can carry Kali Linux in your pocket and have it running in minutes on an available system
  • It’s customizable — you can roll your own custom Kali Linux ISO image and put it onto a USB drive using the same procedures
  • It’s potentially persistent — with a bit of extra effort, you can configure your Kali Linux “live” USB drive to have persistent storage, so the data you collect is saved across reboots
In order to do this, we first need to create a bootable USB drive which has been set up from an ISO image of Kali Linux.

What You’ll Need

  1. verified copy of the appropriate ISO image of the latest Kali build image for the system you’ll be running it on: see the details on downloading official Kali Linux images.
  2. If you’re running under Windows, you’ll also need to download the Win32 Disk Imager utility. On Linux and OS X, you can use the dd command, which is pre-installed on those platforms.
  3. A USB thumb drive, 4GB or larger. (Systems with a direct SD card slot can use an SD card with similar capacity. The procedure is identical.)

Kali Linux Live USB Install Procedure

The specifics of this procedure will vary depending on whether you’re doing it on aWindowsLinux, or OS X system.

Creating a Bootable Kali USB Drive on Windows

  1. Plug your USB drive into an available USB port on your Windows PC, note which drive designator (e.g. “F:\”) it uses once it mounts, and launch the Win32 Disk Imager software you downloaded.
  2. Choose the Kali Linux ISO file to be imaged and verify that the USB drive to be overwritten is the correct one. Click the “Write” button.
    kali-usb-install-windows
  3. Once the imaging is complete, safely eject the USB drive from the Windows machine. You can now use the USB device to boot into Kali Linux.

Creating a Bootable Kali USB Drive on Linux

Creating a bootable Kali Linux USB key in a Linux environment is easy. Once you’ve downloaded and verified your Kali ISO file, you can use the dd command to copy it over to your USB stick using the following procedure. Note that you’ll need to be running as root, or to execute the dd command with sudo. The following example assumes a Linux Mint 17.1 desktop — depending on the distro you’re using, a few specifics may vary slightly, but the general idea should be very similar.
WARNING: Although the process of imaging Kali Linux onto a USB drive is very easy, you can just as easily overwrite a disk drive you didn’t intend to with dd if you do not understand what you are doing, or if you specify an incorrect output path. Double-check what you’re doing before you do it, it’ll be too late afterwards.
Consider yourself warned.
  1. First, you’ll need to identify the device path to use to write the image to your USB drive. Without the USB drive inserted into a port, execute the command
    sudo fdisk -l
    at a command prompt in a terminal window (if you don’t use elevated privileges with fdisk, you won’t get any output). You’ll get output that will look something (not exactly) like this, showing a single drive — “/dev/sda” — containing three partitions (/dev/sda1, /dev/sda2, and /dev/sda5):
    Parallels DesktopScreenSnapz007
  2. Now, plug your USB drive into an available USB port on your system, and run the same command, “sudo fdisk -l” a second time. Now, the output will look something (again, not exactly) like this, showing an additional device which wasn’t there previously, in this example “/dev/sdb”, a 16GB USB drive:FinderScreenSnapz002
  3. Proceed to (carefully!) image the Kali ISO file on the USB device. The example command below assumes that the ISO image you’re writing is named “kali-linux-1.0.9a-amd64.iso” and is in your current working directory. The blocksize parameter can be increased, and while it may speed up the operation of the dd command, it can occasionally produce unbootable USB drives, depending on your system and a lot of different factors. The recommended value, “bs=512k”, is conservative and reliable.
     dd if=kali-linux-1.0.9a-amd64.iso of=/dev/sdb bs=512k
Imaging the USB drive can take a good amount of time, over ten minutes or more is not unusual, as the sample output below shows. Be patient!
The dd command provides no feedback until it’s completed, but if your drive has an access indicator, you’ll probably see it flickering from time to time. The time to dd the image across will depend on the speed of the system used, USB drive itself, and USB port it’s inserted into. Once dd has finished imaging the drive, it will output something that looks like this:
5823+1 records in
5823+1 records out
3053371392 bytes (3.1 GB) copied, 746.211 s, 4.1 MB/s
That’s it, really! You can now boot into a Kali Live / Installer environment using the USB device.

Creating a Bootable Kali USB Drive on OS X

OS X is based on UNIX, so creating a bootable Kali Linux USB drive in an OS X environment is similar to doing it on Linux. Once you’ve downloaded and verified your chosen Kali ISO file, you use dd to copy it over to your USB stick.
WARNING: Although the process of imaging Kali on a USB drive is very easy, you can just as easily overwrite a disk drive you didn’t intend to with dd if you do not understand what you are doing, or if you specify an incorrect output path. Double-check what you’re doing before you do it, it’ll be too late afterwards.
Consider yourself warned.
  1. Without the USB drive plugged into the system, open a Terminal window, and type the command diskutil list at the command prompt.
  2. You will get a list of the device paths (looking like /dev/disk0/dev/disk1, etc.) of the disks mounted on your system, along with information on the partitions on each of the disks.
    TerminalScreenSnapz010
  3. Plug in your USB device to your Apple computer’s USB port and run the command diskutil list a second time. Your USB drive’s path will most likely be the last one. In any case, it will be one which wasn’t present before. In this example, you can see that there is now a /dev/disk6 which wasn’t previously present.
    TerminalScreenSnapz011
  4. Unmount the drive (assuming, for this example, the USB stick is /dev/disk6 — donot simply copy this, verify the correct path on your own system!):
diskutil unmount /dev/disk6
  1. Proceed to (carefully!) image the Kali ISO file on the USB device. The following command assumes that your USB drive is on the path /dev/disk6, and you’re in the same directory with your Kali Linux ISO, which is named “kali-linux-1.0.9a-amd64.iso”:
sudo dd if=kali-linux-1.0.9a-amd64.iso of=/dev/disk6 bs=1m
Note: Increasing the blocksize (bs) will speed up the write progress, but will also increase the chances of creating a bad USB stick. Using the given value on OS X has produced reliable images consistently.
Imaging the USB drive can take a good amount of time, over half an hour is not unusual, as the sample output below shows. Be patient!
The dd command provides no feedback until it’s completed, but if your drive has an access indicator, you’ll probably see it flickering from time to time. The time to dd the image across will depend on the speed of the system used, USB drive itself, and USB port it’s inserted into. Once dd has finished imaging the drive, it will output something that looks like this:
2911+1 records in
2911+1 records out
3053371392 bytes transferred in 2151.132182 secs (1419425 bytes/sec)
And that’s it! You can now boot into a Kali Live / Installer environment using the USB device.
To boot from an alternate drive on an OS X system, bring up the boot menu by pressing theOption key immediately after powering on the device and select the drive you want to use.

source : kali.org

Thursday, 28 January 2016

How To Install Kali Linux In Virtual Machine


Installing kali linux( backtrack 6 ) is not much harder as it was in down 1,2,3 versions of backtrack but anyway if you are stuck some where this step by step guide to install kali linux under virtual machine . why virtual machine ? because it gives you a safe environment to play and explore without damaging your physical hard drive , or any data loss what you should know before continue :
  • basic knowledge of virtual machine’s
  • basic knowledge of networking concepts ( TCP IP )
  • basic linux or any *nix ( if you ever worked on Linux then you are good to go )
  • time and patience
what is required :
  1. Download Kali LinuxISO
  2. virtual machine ( i am using VMware workstation in tutorial , if you have virtualbox or vmplayer then its good installation process is pretty same in every virtual platform )
Installation Process :
1 : click on create new virtual machine


create new virtual machine

2 : choose ISO


choose kali linux ISO
choose ISO

3 : Select Guest Operating System


select guest operating system

4 : Set name and location 
kali-linux4
5 : Set disk space ( 20 GB is good enough, minimum 12 GB to work smoother )
kali-linux-5
5 : Review the hardware configuration and start the virtual machine 


kali linux install guide
Select Graphical Install

6 :  Select Graphical Install go through normal language and timezone host-name selection etc
Set your “root” password and don’t forget it


set root password and dont forget it
set root password and don’t forget it

7 : Disk Partition  ( if you are installing freshly without any dual boot then simply use guided and use full virtual disk )


use full virtual disk

8: Select hard-drive and select all-in-one  ( for new users ) or if you don’t know just choose all in one 


use full virtual disk

9 :  click on finish partitioning and write changes to disk  , choose yes to write 
kali-linux-17
kali-linux-18
10 : wait until installer finish copying files setting system

kali-linux-19
11 :  set network mirror and set boot-loader ( very important )
mirror
kali-linux-21
12 : after installation restart and login with username ” root ” and password ( what you set at step 6 )
kali-linux-23
kali-linux-24


kali linux


Copyright @ 2016 Elite Hackers.

Designed by Alpha